Our First Christmas

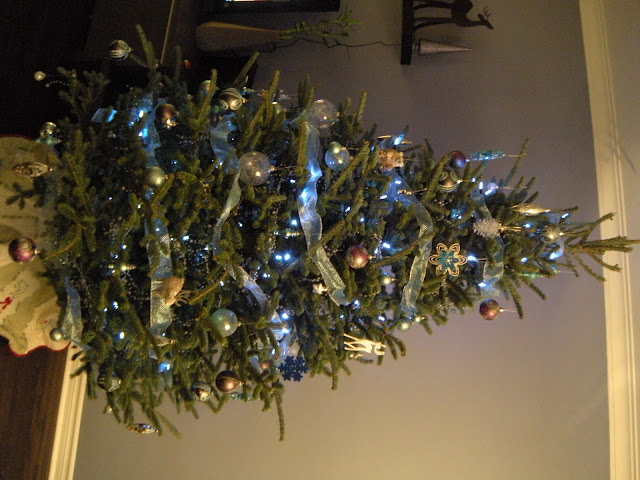
This December marks our first Christmas at the house!  Back in November, I've started convincing Kel that I wanted a Christmas tree.. it'll be our first real Christmas tree!  Growing up, we've always had an artificial tree, so I've wondered if there was a difference.  I've heard many things about a real tree like waking up to the fresh tree smell and all the goodness.  After reading up on the different breeds, we purchased a Douglas Fir!  Online, and after talking to a few people, they all said that a fresh tree would last at a stretch, three weeks and that some may look droopy after two.  Well, we've had ours since December 1st, and after twenty days, it's still looking perky and gorgeous! :)

It took us all of November to collect the ornaments, the ribbon garland, and the berry garland.  I didn't realized that department stores like The Bay starts selling their Christmas products in October, before Halloween's over!  So by the time I started shopping, a lot of their stock were either sold out or had limited stock.  Anyhow, I thought I'd share a few close ups of the ornaments.


And around the house, we adopted a reindeer and polar bear for one of the ledges on our living room wall.  They're currently guarding our Kinect games. :)

And here's what we did with some leftover ornaments!

Two more reindeers and trees on our ledge...(and our Kinect sensor..)

A decorative tree we got for our foyer... (Next year, I'll get that wreath :)

And finally, ladies and gentlemen, I present you with Mr. Raphael Plant!

Our Foyer Transformation

I've been meaning to write this for a while, but we've been quite busy the past month hosting a series of mini housewarming parties starting with a pizza dinner for Kel's coworkers, to a potluck dinner party with our friends, then a dinner party with his relatives, and finally an early Christmas potluck for my coworkers.  One advantage to all this: our fridge has been jammed packed with leftovers week after week!  On with the post...

This is what our foyer looked like when we first acquired the house.  The fake white brick tiles on the walls; the gross brown carpet in the entranceway (seriously, who uses permanent carpet in the entrance?!); the ugly brown metal door with the mail slot; metal railing that was way too low for me to feel safe; oh, and they had a ceiling fan light fixture!  <-- And yes, we ripped it all out!

And here.. the long awaited for after pictures!  Wait for it... wait... :)

Our new door, with the frost pane and iron wrought.

The sexy new glass railing Kel put in.  He stained the banisters, and put in new treads for the steps, too!

Our new configuration in the foyer.  Isn't that curvy side table and stool cute?  We thought they look really cartoony. :)

Oh, and here's my bubble chandelier!  (How could BubBLeS not have a bubble chandelier? :)

AND.... altogether!

We have Ventilation Fans!

Kel spent this past weekend putting in ventilation fans for our bathrooms.  Yes, that's right, our bathrooms didn't have fans in them before because apparently, back in the day when they built it, it wasn't seen as a necessity.  Our bathroom had a giant awning window, which meant you could open it in rain or snow for proper ventilation.  But come on, who'd want to open a window in -40 degrees temperature just to let out a little steam?  Seems so ironic especially when you like hot showers!  Anyways, the fans have been on Kel's to-do list for quite some time now, but since he needs to go into the attic, he could only do it in the autumn or spring.  (It's too hot up there in the summer, and too cold in the winter.)  It was a lot of clean up afterwards, since he had to saw a hole in the ceiling, and rewire the light switches to also house an on/off for the fan, but hey, no more crazy humidity and fogging up the bathrooms! :)

Bake-N-Blog: Holiday Edition - Chocolate Crackles

I've been aching to whip out my Kitchenaid and bake something sweet for the past couple weeks.  I've even stocked up on some cream cheese at the last sale so I can bake up a cheesecake when the mood hits.  So what did I do when I read about Kelly from Jax Does Design holding a Bake-N-Blog? Sign up of course!  I went through the list of recipes provided and decided to give Chocolate Crackles a try.  I mean, what else could be better than chocolate rolled in sugar.. and more sugar? :)  So here goes....

This was a two part recipe:
Part 1 - Mix everything together, divide it into four parts, wrap and fridge.
Part 2 - Roll each part into one inch balls, roll in sugar, roll in icing sugar, and bake.

So I did Part 1 Monday night, wrapped it up, threw it in the fridge, no problems.  The only step that took a bit more time was chopping up the chocolate for the melting process, and trying not to melt too much in my hands.

Part 2, I did Tuesday night (tonight, just in time for the Bake-N-Blog.. yes, I procrastinated!), and on the right, you can see my wrapped portions, with the measured sugars ready for rolling!  And of course, my laptop with the recipe loaded.

I confess, I only baked one of the four portions tonight, because I'm saving the other three portions for a potluck this weekend.  (I hope that doesn't disqualify me for the Bake-N-Blog!)  But hey, that's the pro to this recipe, you can save the portions for a later time!


Part 2 of this recipe was easy enough to do.  However, I soon realized that time was of the essence, because the longer I took to roll each ball, the more the next one would melt in the palms of my hands!  I actually had to take a break, wrap up half of it and threw it in the freezer for five minutes before I could keep rolling.  A tip for anyone using this recipe: Instead of rolling each ball in your palms, roll in sugar, roll in icing sugar and then start on the next piece.  Try rolling in palms, roll in sugar, next.  You can always roll them all in icing sugar in the end with less melting issues.

Below, you can see my chocolate palms, and a nosy Kingsley bunny trying to get a piece of the action.


And here is what the chocolate crackles looked like fresh from the oven:

And how could I resist showing them in our Christmas Reindeer dish!

Final verdict? Yum Yum Yum! Crackly on the outside (because of the sugar), and chocolatey soft on the inside!  And they only took 14 minutes to bake!  The portioning is definitely a huge plus. :) And that's my conclusion to the Bake-N-Blog: Holiday Edition!