Our First Christmas

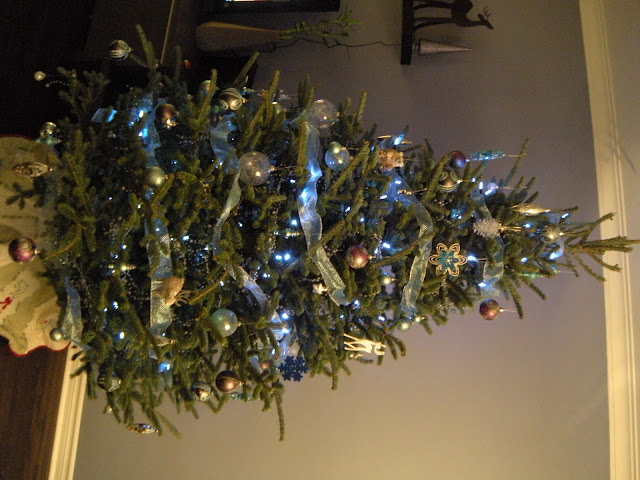
This December marks our first Christmas at the house!  Back in November, I've started convincing Kel that I wanted a Christmas tree.. it'll be our first real Christmas tree!  Growing up, we've always had an artificial tree, so I've wondered if there was a difference.  I've heard many things about a real tree like waking up to the fresh tree smell and all the goodness.  After reading up on the different breeds, we purchased a Douglas Fir!  Online, and after talking to a few people, they all said that a fresh tree would last at a stretch, three weeks and that some may look droopy after two.  Well, we've had ours since December 1st, and after twenty days, it's still looking perky and gorgeous! :)

It took us all of November to collect the ornaments, the ribbon garland, and the berry garland.  I didn't realized that department stores like The Bay starts selling their Christmas products in October, before Halloween's over!  So by the time I started shopping, a lot of their stock were either sold out or had limited stock.  Anyhow, I thought I'd share a few close ups of the ornaments.


And around the house, we adopted a reindeer and polar bear for one of the ledges on our living room wall.  They're currently guarding our Kinect games. :)

And here's what we did with some leftover ornaments!

Two more reindeers and trees on our ledge...(and our Kinect sensor..)

A decorative tree we got for our foyer... (Next year, I'll get that wreath :)

And finally, ladies and gentlemen, I present you with Mr. Raphael Plant!

Our Foyer Transformation

I've been meaning to write this for a while, but we've been quite busy the past month hosting a series of mini housewarming parties starting with a pizza dinner for Kel's coworkers, to a potluck dinner party with our friends, then a dinner party with his relatives, and finally an early Christmas potluck for my coworkers.  One advantage to all this: our fridge has been jammed packed with leftovers week after week!  On with the post...

This is what our foyer looked like when we first acquired the house.  The fake white brick tiles on the walls; the gross brown carpet in the entranceway (seriously, who uses permanent carpet in the entrance?!); the ugly brown metal door with the mail slot; metal railing that was way too low for me to feel safe; oh, and they had a ceiling fan light fixture!  <-- And yes, we ripped it all out!

And here.. the long awaited for after pictures!  Wait for it... wait... :)

Our new door, with the frost pane and iron wrought.

The sexy new glass railing Kel put in.  He stained the banisters, and put in new treads for the steps, too!

Our new configuration in the foyer.  Isn't that curvy side table and stool cute?  We thought they look really cartoony. :)

Oh, and here's my bubble chandelier!  (How could BubBLeS not have a bubble chandelier? :)

AND.... altogether!

We have Ventilation Fans!

Kel spent this past weekend putting in ventilation fans for our bathrooms.  Yes, that's right, our bathrooms didn't have fans in them before because apparently, back in the day when they built it, it wasn't seen as a necessity.  Our bathroom had a giant awning window, which meant you could open it in rain or snow for proper ventilation.  But come on, who'd want to open a window in -40 degrees temperature just to let out a little steam?  Seems so ironic especially when you like hot showers!  Anyways, the fans have been on Kel's to-do list for quite some time now, but since he needs to go into the attic, he could only do it in the autumn or spring.  (It's too hot up there in the summer, and too cold in the winter.)  It was a lot of clean up afterwards, since he had to saw a hole in the ceiling, and rewire the light switches to also house an on/off for the fan, but hey, no more crazy humidity and fogging up the bathrooms! :)

Bake-N-Blog: Holiday Edition - Chocolate Crackles

I've been aching to whip out my Kitchenaid and bake something sweet for the past couple weeks.  I've even stocked up on some cream cheese at the last sale so I can bake up a cheesecake when the mood hits.  So what did I do when I read about Kelly from Jax Does Design holding a Bake-N-Blog? Sign up of course!  I went through the list of recipes provided and decided to give Chocolate Crackles a try.  I mean, what else could be better than chocolate rolled in sugar.. and more sugar? :)  So here goes....

This was a two part recipe:
Part 1 - Mix everything together, divide it into four parts, wrap and fridge.
Part 2 - Roll each part into one inch balls, roll in sugar, roll in icing sugar, and bake.

So I did Part 1 Monday night, wrapped it up, threw it in the fridge, no problems.  The only step that took a bit more time was chopping up the chocolate for the melting process, and trying not to melt too much in my hands.

Part 2, I did Tuesday night (tonight, just in time for the Bake-N-Blog.. yes, I procrastinated!), and on the right, you can see my wrapped portions, with the measured sugars ready for rolling!  And of course, my laptop with the recipe loaded.

I confess, I only baked one of the four portions tonight, because I'm saving the other three portions for a potluck this weekend.  (I hope that doesn't disqualify me for the Bake-N-Blog!)  But hey, that's the pro to this recipe, you can save the portions for a later time!


Part 2 of this recipe was easy enough to do.  However, I soon realized that time was of the essence, because the longer I took to roll each ball, the more the next one would melt in the palms of my hands!  I actually had to take a break, wrap up half of it and threw it in the freezer for five minutes before I could keep rolling.  A tip for anyone using this recipe: Instead of rolling each ball in your palms, roll in sugar, roll in icing sugar and then start on the next piece.  Try rolling in palms, roll in sugar, next.  You can always roll them all in icing sugar in the end with less melting issues.

Below, you can see my chocolate palms, and a nosy Kingsley bunny trying to get a piece of the action.


And here is what the chocolate crackles looked like fresh from the oven:

And how could I resist showing them in our Christmas Reindeer dish!

Final verdict? Yum Yum Yum! Crackly on the outside (because of the sugar), and chocolatey soft on the inside!  And they only took 14 minutes to bake!  The portioning is definitely a huge plus. :) And that's my conclusion to the Bake-N-Blog: Holiday Edition!

Our Night Stand

Way back when we decided we were going to get a king size bed, we knew we'd need new night stands.  Something small; something that actually matched our colour themes; something less clunky.  So far, we've been using Kel's old night stand on my side of the bed and yes, I find it clunky!  (You can see it on the right there.)


I was putting off looking for a new pair, since I haven't really got a clue what I was looking for.  I just knew we needed something small and contemporary looking, so it wouldn't take up too much room.  The original night stands that were designed for that bed were ridiculously out of our budget and there were too much curves and details for them to be custom made.  So yes, I was taking a break from the online searches and secretly hoping it'd come to me... and sure enough it did!  Thank you Nancy @ Marcus Design!  She had written a piece on Leah Balderson's condo featured in House & Home which is where I found this darling night stand!
{image via Marcus Design via House & Home}

Isn't it absolutely gorgeous?  I fell in love with it the moment I saw it!  And with Nancy's help, located the store that carries it.  However, as usual, its way out of our budget, or rather, way more than I'd be willing to pay for it no matter how much I loved it.  So, the search continued...  Until one day, Kel said, "Maybe we can make it?"  Wooo.. now there's an idea!  He investigated into what type of tools/drill bits he'll be needing and got a quote from a woodcraft place as well.  The latter won, and the panels will be coming home tomorrow!  Next up, buying a piece of wood for the tabletop, assembly, paint, and put on the nailhead trim!  This is so exciting! Stay tuned!

The Bunnies had a mini photoshoot

Woah.. just realized I've taken over a month off from my last post... my bad!

Back in late September, not long after my last post, Flo came over and did a mini photoshoot of Kingsley and Keiko!  We wanted to get some shots in while they're still young... and Flo ended up sprawled all over our kitchen and living room floors to get these great pics.


We shared these pics and some others with quite a few people, and so far, majority voted on Kingsley being the cuter of the two. What do you think?

Two New Members of our Family!

Meet... Kingsley!  He's the active, dominating bunny weighing in at 660 grams.  Quite the troublemaker, always curious and wanting what others have, but he sure is a cutie!


And here's Keiko!  She's the timid, shy bunny weighing in at 550 grams.  She's super fluffy and being the cautious bunny that she is, always plays by the rules.. which also means she gets the shorter end of the stick when it comes to Kingsley.


But at the end of the day, they're just two cute, happy bunnies!


Our Dining Room is Complete!

We've finally picked out a chandelier, ordered it... and it came in!  Kel had it installed last night and I finally got the chance to post it!


And for those concerned about Mr. Raphael Plant, you can see him on the table there.. with a new sprout standing tall and proud!

The Last Mile (for our railings!)

For the last while now, whenever anyone asked us, "How's the house? What are you working on now?", our reply has been "the staircase railings..."  It's gotten to the point where we're starting to get "Still?" Well, it'll soon be something else, because we're on the last mile!  The truth of the matter is, Kel had to look for a woodshop that does railings, buy the posts, stain & varnish them, work out the technicalities of installing them, etc etc.  So why do I say we're on the last mile now?  Because the glass panels we ordered came in today and they're in!  We spent the latter part of tonight attaching all the bubbles to our foyer chandelier.  (We've bought the light for more than half a year now, and it's been sitting in the basement waiting for this day.)  The only thing left now, is for Kel to finish the top railing and install it.  Can't wait!

Talk about efficiency! (Part 2 of "The painting came in")

We received the painting misprint Monday afternoon.  I chatted with their online support not long after it's arrival and got confirmation within the hour.  Today is Friday, and the reprint arrived!  Who would've thought I'd be able to get the reprint the same week?  I have to say I'm quite pleasantly surprised and would definitely recommend CanvasPop to anyone else looking for similar service.  Although they messed up the first print, but I seriously don't think you'd find any other company with such efficient customer service and follow up.  Definitely two thumbs up!

The painting came in! (sort of)

I just realized that I've taken a whole month off blogging.  What's happened since then... hmm..

-> We've finally put down a deposit for our bed and sofa.  That'll take six to eight weeks to deliver.  We're estimating mid-September?

-> We've been waiting for the mattress we like to go on sale, and it finally did!  That got delivered two weeks ago and we were so excited, we immediately took out the old one, dismantled the bed frame and laid out the new king-size on the floor.  We get much better sleep now, and I no longer grunt at Kel when he comes into bed late and wakes me up. :)

-> We're still having endless bbqs with different friends at the house, as that's the easiest and fastest, ending off with ice cream for dessert of course!

-> For those who've been worried about Mr. Plant, don't worry, my black thumb hasn't killed him yet.  He's still alive and doing quite well.  The new shoot has grown quite tall and we can see tiny nubs on him about to unravel to become full leaves.  Kel has also decided that Mr. Plant needs a first name, and so he is now Mr. Raphael Plant.

-> Kel is still battling with the weeds out in the lawn.  He's making progress, but the battle is still not over!


And now, on with the post..

I got this discount coupon for an online photo printing place last month, and I've been working with their designers to turn one of our photos from Shanghai into a triptych to put in our bedroom.  Kel and I figured it'd be easier to print a picture we like for wall art, then to spend endless hours shopping for one we can both agree on.  What's great with dealing with online vendors (as I've discussed with Flo), is you don't feel so bad asking for more proofs.  I had never intended to print photos any bigger than the regular 4x6, so setting 5x7 as a maximum seemed to make sense.  (That's the equivalent of setting my camera to the three megapixel setting even though it had the capacity of shooting at ten.  It also didn't help that for some reason I thought a three megapixel photo equated to a three megabyte file, but that's a different story.)  Anyhow, so I was working with their designer (and Flo) and contemplated the possibility of printing the picture itself, versus one with the digital paint effect, black and white, and colour isolation.  This took quite a bit of time, as everytime I asked for a new proof, it'd take the designer a few days to get back to me.  In the end, we decided to go with just the picture itself with no effects as the slight blur would work with printing on canvas.  It wasn't another two weeks before I got another email with the UPS tracking number saying it would be delivered today!  I was so excited, I stayed home (worked from home that is,) to wait for it and of course it had to come during a meeting, but after that I went to open the box and...


... it was our picture with the digital paint filter!  They printed the wrong proof!  After chatting online briefly with their support person, they admit the designer had a misunderstanding, and will be reprinting our picture as soon as possible.  The down side is, it'll be another week or two before it gets here, but when it does arrive, we'll have both copies right in front of us to decide which we'd want to hang.  As well, it's not like we can hang it before the bed comes anyways, so it's a win-win for us!

Oh, and of course with both of us being in the picture, I'd have to thank Sunny for helping us frame the setting and taking multiple shots.  I actually have a series of photos from when Kel and I were getting onto the rock, and having random people in the background, to this, and of course, one where Sunny insisted we pointed at something. :P
Our latest member..

Those who know me well, (or have been down south with me,) would know how much I love palm trees.  Why?  Because the simple sight of palms would instantly relax me, as they carry the connotation that I must be someplace tropical and therefore on vacation.  And who doesn't like vacations? :)

So where was I going with this? Ah, yes, Kel and I were in a store one day and saw these mini palms called "Sago Palm".  Now, I've been on the lookout to adopt some greenery for the house.  The only problem is, I don't exactly have a green thumb.  In fact, it's more like a black thumb. (I've killed a number of plants in the past.. not really knowing why..)  So we decided to do some research before going ahead with the purchase.  What we found out was that it's not really a palm but a "Cycad", a group of plants that lived back in the prehistoric times.  It's a hardy plant that has no temperature or humidity preference, and extremely low maintenance, perfect as a beginner plant!  Heck, it survived and outlived the dinosaurs, so hopefully it'll survive me, as well. :)  Now, I just have to remember to leave it alone, and not over water him...

On a side note for anyone else who's thinking of adopting one of these cuties, they are poisonous to humans and animals if ingested, and unfortunately almost never properly noted at the store.  So you may want to think twice if you have pets or kids in the house.

What's that bubbling in my oven?

We went to the farmer's market up in Waterloo on Canada's Day.... and I ended up bringing home a lot of berries!  So what better to do with them, than make a pie? :)  With guidance from Moj over at Something Lemon, I proceeded to make my very own pie crust.  It was quite the adventure I tell you, not as hard as it looks, but definitely quite an experience!  Next time, I've got to learn to seal off the edges properly... midway the pie was bubbling over!

And here we have it, my first blueberry pie!


Yumm.. so much juicier when it's homemade!

Happy Canada Day!

One of the perks of working from home?  Saving time on commute equates time to make breakfast!  Make no mistake, there's another slice of melted havarti cheese hiding under the egg. :)

Our First Barbecque

Kel and I were browsing at barbecques whenever we were at hardware stores since its barbecque season and its the featured product everywhere.  It wasn't priority, but definitely a nice to have with the great weather we've been getting.  Then one weekend afternoon, I get a call from Elaine and TA DA!  She and Ken came by and dropped off a barbecque  as our housewarming gift!  Awesome!  Thanks guys!  Kel's put it together a few weeks ago, and tonight, we had our first barbecque!  Burgers topped with sautéed mushrooms, onions, melted harvarti cheese, and crispy bacon!  Mmmm Mmmm Good!


One step closer to a complete dining room!

We've been on the lookout for dining chairs for quite some time now and we got really close two months ago.  We saw a style we liked at a warehouse, but the unfortunately, they weren't stocking any more and there were only three left.  What on earth were we to do with only three chairs?  So the search continued...  until today that is!  We went by a one day sale and finally found these that looked similar to what we had in mind.  We weren't able to take them home with the car we were driving, but didn't want to risk losing them from some human error (even though we paid for them and they were on hold, I mean, remember the battle with Sears?!)  So, we immediately went back with a van, did an inspection, and brought them home!

Here's a close up of the chairs we got.  We like the shape of the back, with the detailing of the nail studs  on the seat.


Looking back on what we started with when we first bought the house, we really came a long way.  Check out how the dining room looked before:


And as promised, our dining room now with our new chairs:


What an awesome way to mark our one year at the house.  Next up for this room: a chandelier, and Kel's project to make a two seater bench for the dining table!

Summery Sundays...

... makes me want to have pancakes!  And what's better than blueberry pancakes? RASPBERRY!!

Actually, my original intention was to make blueberry pancakes because they are my absolute favourite, but when I was at the store, I saw these perfect organic raspberries.  Now, how often do you see organic raspberries that actually look perfect?! Like, never!  So of course, I got to thinking.. how come no one ever makes raspberry pancakes?  And here it is.. I made one blueberry pancake, one raspberry pancake... and one blueberry-raspberry pancake!!  Of course, the raspberry ones don't look as nice since they don't hold together as well under heat. BUT, they are absolutely divine!  I'm normally not a raspberry person, but the tartness it gives the pancakes (along with dosing it with pure maple syrup of course) is A-MA-ZING!!

Warmer Weather = Outdoor Activities aka Yardwork

One of the pressing matters we had at hand last month was the rapid rate our lawn was growing.  We didn't have a lawn mower yet at the time, and even if we were to get one, we'd still need a place to house it.  (For those who haven't realized, our house doesn't have a garage.)  So our priority became shopping for a mower that was on sale, as well as the shed.  For those who've shopped at lawn mower sales before in spring, you'd know exactly what we ran into. Back orders.  What I don't understand to this day, is how there could be so much demand for lawn mowers every year.  Same goes for air conditioners and fans in the spring, and snow blowers and shovels every winter.  They're always sold out!  I would think that our electronic/gas powered devices work for many years. (At least I know my dad still owns his gas mower from the late 80s, fans too, by the way!) So are people just replacing them because they're old?!  Anyhow, we didn't end up getting the mower for another 3 weeks from when we bought it, but then that buys Kel time to put up the shed.

He, along with Erica's help, dug the majority of the six inches in our backyard for the base of the shed.  Ken helped Kel get the crushed rocks and offload them to form the base and alas, Kel's finally got his shed up this week!  Below, you can see his 8x8 shed nestled in among our trees.  (Did I mention how much I love our trees? :)  It's got windows and a skylight in the roof, too!  And there's Kel's tools and his new mower in their now home. 


I should probably mention that we didn't wait another month to mow our front lawn and backyard.  We borrowed Ken's mower in the meantime and took care of it first. :)

Wall Art

I finally got my wall decal installed!  I've had this idea to put up vinyl wall decals on my living/dining room wall for quite some time now and have been looking around for what designs are available out there.  I came across this blossom branch with birds that I completely fell in love with and had to get, but of course this was way back before much of the house was done, so I had to wait for the walls to be painted, the hardwood put in, and the whole nine yards.  During this waiting period, I found out that a friend of ours was actually looking to launch his own vinyl wall decal company and he informed me that when I was ready and have a design in mind I should check and see how their operations are going.  Sooooo.. that's what I did!  I showed him what I was looking for, and he said they have something similar and can always readjust their branches into the shape I like, etc etc.  What's awesome is that because they're local, they can come over to our house with colour palettes to try out on our walls to make sure the combination matched.  As well, they can come over to install the decal for us!  How awesome is that?  Totally takes the guess work out of shopping online and wondering if the colour showing up on my screen is actually the colour I'm getting!  Another great thing about these wall decals is that they're cheap and removable!  So you can change them as frequent as you'd like without damaging your walls and the messy work associated with changing wall paper!  Below you can see the design I've got on my wall now.  I'm contemplating doing another one for my bedroom walls...  For anyone who's interested, check out http://www.wallperfection.ca/